| Cam's Arcade Page |  |
| Cam's Arcade Page | |
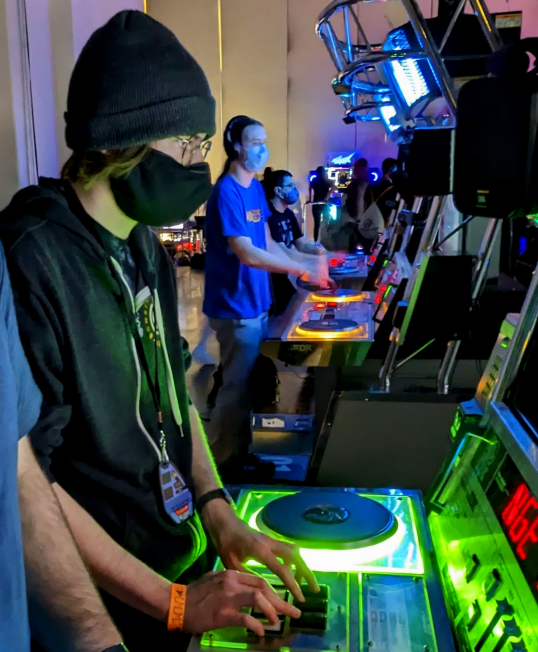
I really love arcade games. All sorts of arcade games. The history and concept of mechanical amusement really interests me in general so it's one of my favorite things to talk about.
This is a page dedicated to arcade games (and the ones I currently own as of the writing of this page). If you're looking for informational articles on how to hack Pac-Man, click here. For a fun page on Pac-Man trivia, click here.
"Pinout", in the context of an arcade game, refers to what each pin on the edge connector does and where it connects to. The edge connector is the edge of the game board (much like the gold pins you see inside a video game cartridge for the NES or Game Boy) and each pin connects to a different wire on the wiring harness when plugged in. Those wires run to things like power, controls, the monitor, etc. Everything you would expect them to. The harness is like the circulatory and nervous systems of an arcade game.
Prior to 1986 arcade game circuit boards used varying proprietary pinouts. These pinouts varied based on manufacturer, hardware, the style of game, and pretty much any other random reason you can think of. Some manufacturers, like Konami, kept a relatively consistent pinout (the Konami pinout used in the early 80s was used across most of their games, making them plug-and-play in Konami-wired harnesses with the exception of differing controls) but many others were much less consistent and some manufacturers used unique pinouts for each and every game they released.
Basically there was no accepted or adopted standard yet in the world of arcade pinouts and the ability to plug one game board into another cabinet's harness was largely impossible. This was a growing issue in that video game conversion was becoming an inevitability- y'see, a game that performed well when first released and first introduced to arcades would gradually decline in profits as players became bored of the game. It was akin to a movie theater showing the exact same movie for months on end- people lost interest. As a result the operator was left bagholding this useless, wooden monolith of a machine taking up precious floor space in their arcade or business with nothing else to do with it. At this point ideally they had made back their investment but the machine itself had served its purpose and was no longer wanted by either the players or the operator.
Some manufacturers attempted to dance around the imminence of conversion with kits that stayed within the realm of their proprietary walled garden- Bally Midway, for example, released kits to convert Pac-Man into Ms. Pac-Man or Pac-Man Plus, but these kits (altho graciously needed and wildly successful) would also succumb to the passage of time once players again lost interest, and with no succeeding kits these cabinets would again fall unplayed and unprofitable. Some aftermarket manufacturers provided unlicensed bootleg kits to further the longevity of these machines, like Ms. Pac Attack or the many Pac-Man speedup kit hacks. Similar grey-market kits were available for other games like Missle Command, Galaxian, Donkey Kong and more.
Eventually the industry buckled and starting with games like Universal's Mr. Do! conversion became the new norm. Older cabinets were stripped of their original artwork (or not), gussied up with a new look (or not), wired up with a new harness and controls, and pushed back out onto the floor running an entirely new game in order to revitalize an old machine's ability to generate profit. A wise company/distributor would release their conversion kits with artwork to accompany the game, allowing for a bright and tasteful change from an older, tired game into something new and enticing. A wise operator would install these art pieces and take care in transforming an old machine into something fresh and exciting. Most of these people were not wise. It's not uncommon for converted cabinets to look ramshackle and bastardized, often sprayed black all over and missing artwork, typically lacking control panel overlays and almost always lacking new bezels, or converted in such a way that any new buttons drilled into the panel are scattered at any odd angle imaginable. Some manufacturers just flat-out didn't provide artwork, either due to too many potential edgecases with fitting it onto the all sorts of cabinet shapes and styles available or because they realized operators just didn't care. A lot of operators would pitch the included artwork sent to them with the conversion kits, opting not to install it, and so some manufacturers would only ship matching artwork if they were directly contacted and the artwork was requested.
The problem still, even with this wild and weird new world of (typically very ugly) conversions, is that there was still no standard for anything. Conversion kit or not these games still used different proprietary pinouts and the aforementioned issue of inconsistency still had not yet been solved. Remember when every cellphone available on the market used its own unique charging cable? Now think about how micro-USB and USB-C are now the standard (with some manufacturer variation) and how much easier that makes things overall (excluding Apple). Now imagine if every single phone, even within the same manufacturer, used a unique cable. Imagine if every single iPhone had a variation of lightning cable included that was exclusive to the specific model of phone itself. This is what arcade harness pinouts were like. Everything was different and nothing made sense and except for the occasional exception here and there (like most Konami games) these boards and harnesses were not interchangeable and this made conversion (a literal requirement to stay financially afloat in this industry) much more of a headache and hassle than it already was (especially for operators who were only willing to do the bare minimum in the first place).
The following text below was taken from the coinop.org JAMMA tech page. I grabbed the info from the Wayback Machine and pasted it here for your perusement. It details the JAMMA pinout in extensive detail. For a writeup on the history of JAMMA taken from the same page, click here.
JAMMA/AAMA Standard Connector Pinouts

   This Video Game Pinout Data Sheet Was Typed In By James R. Twine.
                     EMail:  jtwine@jtwine.com

                -> JAMMA/AAMA Standard Connector <-

    Updated on 02/22/99: Added AAMA pins, and other AAMA connector
    information.

Name Of Game(s): Many!

Notes: Not all games will use all pins, and some kits may have extra
       connectors for more/different controls!  i.e. Street Fighter II
       and Ikari Warriors.  Some boards, for example, bootleg/pirate
       Street Fighter II-Champion Edition boards, (may) use the
       unused/spare pins for the extra button(s).

       (Pins marked with a "(*)" are optional/spare/undefined.)


                        [56-Pin PCB Connector]
           Solder Side            |             Parts Side
  ________________________________|___________________________________
              GND             | A | 1 |             GND
  ----------------------------|---|---|-------------------------------
              GND             | B | 2 |             GND
  ----------------------------|---|---|-------------------------------
              +5              | C | 3 |             +5
  ----------------------------|---|---|-------------------------------
              +5              | D | 4 |             +5
  ----------------------------|---|---|-------------------------------
              -5              | E | 5 |             -5
  ----------------------------|---|---|-------------------------------
              +12             | F | 6 |             +12
  ----------------------------|---|---|-------------------------------
            - KEY -           | H | 7 |           - KEY -
  ----------------------------|---|---|-------------------------------
       Coin Counter # 2       | J | 8 |      Coin Counter # 1
  ----------------------------|---|---|-------------------------------
     (*) Lock Out Coil #  2   | K | 9 |   (*) Lock Out Coil #  1
  ----------------------------|---|---|-------------------------------
      (Left) Speaker (-)      | L | 10|     (Left) Speaker (+)
  ----------------------------|---|---|-------------------------------
     (*) Right Speaker (-)    | M | 11|   (*) Right Speaker (+)
  ----------------------------|---|---|-------------------------------
         Video Green          | N | 12|        Video Red
  ----------------------------|---|---|-------------------------------
         Video Sync           | P | 13|        Video Blue
  ----------------------------|---|---|-------------------------------
        Service Switch        | R | 14|        Video GND
  ----------------------------|---|---|-------------------------------
      (*) Tilt Switch         | S | 15|          Test Switch
  ----------------------------|---|---|-------------------------------
        Coin Switch # 2       | T | 16|        Coin Switch # 1
  ----------------------------|---|---|-------------------------------
               2P  Start      | U | 17|         1P  Start
  ----------------------------|---|---|-------------------------------
  (TB:H-Dir)   2P  Up         | V | 18|         1P  Up    (TB:H-Dir)
  ----------------------------|---|---|-------------------------------
  (TB:H-Clock) 2P  Down       | W | 19|         1P  Down  (TB:H-Clock)
  ----------------------------|---|---|-------------------------------
  (TB:V-Dir)   2P  Left       | X | 20|         1P  Left  (TB:V-Dir)
  ----------------------------|---|---|-------------------------------
  (TB:V-Clock) 2P  Right      | Y | 21|         1P  Right (TB:V-Clock)
  ----------------------------|---|---|-------------------------------
               2P  Button 1   | Z | 22|         1P  Button 1
  ----------------------------|---|---|-------------------------------
               2P  Button 2   | a | 23|         1P  Button 2
  ----------------------------|---|---|-------------------------------
               2P  Button 3   | b | 24|         1P  Button 3
  ----------------------------|---|---|-------------------------------
        (*)    2P  Button 4   | c | 25|     (*) 1P  Button 4
  ----------------------------|---|---|-------------------------------
     (*) Service Switch 2     | d | 26|     (*) Undefined  / Spare
  ----------------------------|---|---|-------------------------------
              GND             | e | 27|             GND
  ----------------------------|---|---|-------------------------------
              GND             | f | 28|             GND
  --------------------------------------------------------------------


                 [15-Pin Player 3/4+ PCB Connectors]
                                  |---|-------------------------
                                  | 1 | GND
                                  |---|-------------------------
                                  | 2 | +5 VDC
                                  |---|-------------------------
                                  | 3 | Coin Counter
                                  |---|-------------------------
                                  | 4 | (*) Service
                                  |---|-------------------------
                                  | 5 | Coin
                                  |---|-------------------------
                                  | 6 | Start
                                  |---|-------------------------
                                  | 7 | Up
                                  |---|-------------------------
                                  | 8 | Down
                                  |---|-------------------------
                                  | 9 | Left (Center?)
                                  |---|-------------------------
                                  | 10| Right
                                  |---|-------------------------
                                  | 11| Button 1
                                  |---|-------------------------
                                  | 12| Button 2
                                  |---|-------------------------
                                  | 13| Button 3
                                  |---|-------------------------
                                  | 14| Button 4
                                  |---|-------------------------
                                  | 15| (*) Undefined/Spare
                                  |---|-------------------------


              [5-Pin Video PCB Connectors (extra monitors)]
                                  |---|-------------------------
                                  | 1 | Red
                                  |---|-------------------------
                                  | 2 | Green
                                  |---|-------------------------
                                  | 3 | Blue
                                  |---|-------------------------
                                  | 4 | Composite Sync
                                  |---|-------------------------
                                  | 5 | Gnd
                                  |---|-------------------------
Listed in Mame as "Yankee DO!", this is a weird political hack of Mr. Do. Instead of hurling a Power Ball to destroy abstract monsters in a maze full of apples, Yankee Do stars Uncle Sam as he bombs camel-riding Arabian men and pushes barrels of oil. It's a graphics hack for the most part altho it also applies a speedup cheat so that you move quicker when digging.
To the surprise of literally no one familiar with their body of work, this hack comes from Two-Bit Score and is officially branded "Yankee DOodle" according to a photo below taken from KLOV of a Mr. Do board with this hack installed. With a 1990 copyright it seems to fall into that specific niche of "TBS kits designed to revitalize nearly-decade old games".
Two-Bit Score, based out of Texas, was, for whatever ungodly reason, seemingly obsessed with producing these strange abstract rom hacks that range from bizarrely political nonsense (I still can't tell if it's satirical or jingoist at this point) to bizarrely apolitical nonsense (like Vs. Skate Kid Bros. Will finish this later. Depression making it hard to type.
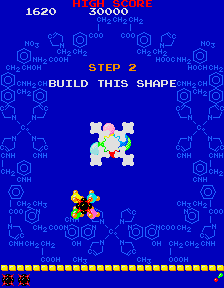
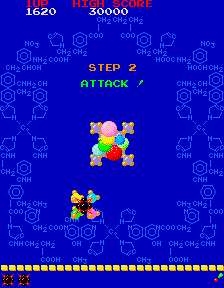
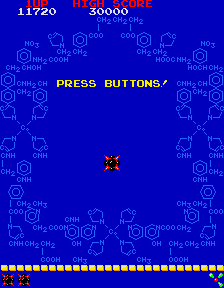
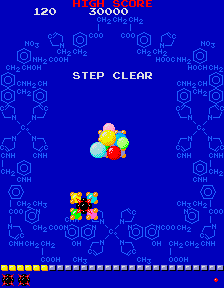
The original arcade version of Namco's "Phozon", hacked into English (using the official translation taken from Namco Museum Vol. 3 on the PS1). This was a major pain in the ass. I could go into more detail about how it works but as of the time of me writing this I feel exhausted just thinking about it.
This is a bit of a convoluted mess, but bear with me. I'm gonna attempt to explain my experience building a power block using the Bob Roberts AC Wiring writeup.
To break this down into simple terms, you need the following:

A couple arcade-themed poems I wrote while listening to Shun's theme from Virtua Fighter 2.
MY ARCADE SPIRIT BURNS ETERNAL LIKE HOT COPPER COILS
HIGH VOLTAGE MEGASHOCK SURGING THROUGH MY VEINS
THE JOYSTICK AND BUTTONS ARE ONE WITH ME
THE CHARACTER I CONTROL AN EXTENSION OF MY SOUL
MY SYNAPSES PULSE WITH ELECTRIC MUSIC
ECHOING IN MY HEAD LONG AFTER THE GAME IS OVER
I LIVE TO PLAY AND PLAY TO LIVE
AND WHEN I'M DEAD AND GONE
DROP IN A QUARTER AND PRESS START
I'M THERE TO CHEER YOU ON